Roasted Lemon Chicken (low carb)

I wish I had been more diligent about photos because this recipe was incredible. But I got too excited about how easy it was and even more excited about how TASTY it was. The balance between the tart of the lemon and mustard with the savory of the chicken and broth was like little explosions in my mouth with each bite. Enjoy!

INGREDIENTS

  • 1.25 cups chicken stock
  • 1/4 cup freshly squeezed lemon juice
  • 2 tsp lemon zest
  • 1 Tbl olive oil

For the lemon rub:

  • 1 Tbl olive oil
  • 1 Tbl whole grain mustard
  • 1 tsp lemon zest
  • 1.5 tsp dried oregano
  • 1 tsp garlic powder
  • 1/2 tsp dried thyme
  • 1/2 tsp sea salt
  • 8 bone-in, skin-on chicken thighs

INSTRUCTIONS

  1. Preheat oven to 400 degrees F
  2. To make the lemon rub, combine all lemon rub ingredients listed above from oil through salt and using your fingers, work the lemon rub onto both sides of the chicken. I put a little bit under the skin, too. There isn’t a ton of this but you only need a little bit per chicken. It packs a delightful punch, so don’t worry if you think you won’t have enough. You will ๐Ÿ™‚
  3. In a large bowl, whisk together chicken stock, lemon juice and lemon zest and set aside.
  4. Heat olive oil in a large oven proof skillet (I used a 12″ cast iron and it was almost too small!) over medium-high heat. Once the oil is hot, add chicken, skin side down and sear both sides until golden brown, 3 minutes per side. Add chicken stock mixture.
  5. Place skillet into oven and roast until completely cooked, through, reaching an internal temp of 175 degrees F, about 30 minutes.
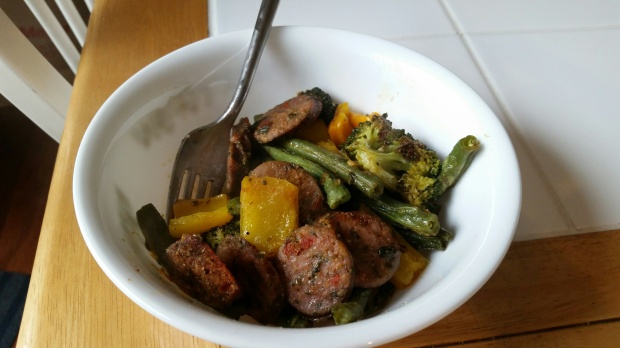
  6. Eat and enjoy! ๐Ÿ™‚ If you are doing low carb, this would be great on its own or you can serve over cauliflower rice, quinoa or wild rice.

Nutritional information per thigh and a portion of the sauce:
183 calories, 11g fat, 1 g carb, 20g protein.

Turkey Burger Cauliflower Bacon Casserole (low carb)

INGREDIENTS:

  • 1 head of organic cauliflower (medium sized is perfect)
  • 1/2 cup gluten free flour (I used brown rice flour because I had it around but you can really use whatever you’d like)
  • 1/2 tsp salt
  • 1ย ย  12 oz package of uncured bacon
  • 2 pounds ground turkey
  • 1 Tbl coconut oil (optional)
  • 1 tsp onion powder
  • 1 tsp dried oregano
  • 1 tsp garlic powder
  • 1 tsp each salt and pepper
  • 8 oz grated cheddar cheese

SAUCE INGREDIENTS

  • 1 Tbl butter
  • 1 Tbl gluten free flour
  • 1.5 cups heavy whipping cream
  • 2 Tbl yellow mustard

INSTRUCTIONS:

  1. Steam the cauliflower until fork tender.
  2. Place cauliflower into a food processor and pulse until it resembles rice.
  3. Set aside in a bowl to cool then add the flour and salt and mix well.
  4. Cook the bacon in a large skillet until cooked. Remove with a slotted spoon to keep the bacon juice in the skillet.
  5. Transfer bacon to a paper towel lined plate to cool. Once cool, chop into pieces.
  6. Add ground turkeyย  and 1 Tbl oil (optional, depending on how much bacon grease you have. If you have 2 Tbl or so of grease, pass on adding oil). Cook until browned
  7. Add onion powder, oregano, garlic powder, salt, pepper and mix well.
  8. Remove turkey with a slotted spoon and transfer to a bowl.
  9. preheat oven to 350 degrees F
  10. For the sauce: Add the butter to the same skillet with the leftover grease and turkey juices and stir in the flour over low heat. Cook until the flour has absorbed the butter then add heavy cream and mustard.
  11. Continue to cook on low heat until the sauce thickens.

ASSEMBLY:

  1. Place 1/2 cup of the sauce to the bottom of a 9×13 baking dish.
  2. Spread the cauliflower mixture on the spread as evenly as possible.
  3. Place 4 oz of grated cheddar over the cauliflower.
  4. Spread the ground turkey over the cheddar evenly.
  5. Pour half of the remaining sauce over the turkey.
  6. Places the remaining cheddar over the sauce
  7. Layer the last bit of sauce over the cheddar and top with the chopped up bacon.
  8. Cover with foil and bake for 30 minutes.
  9. Uncover and bake an additional 5 minutes.
  10. Allow to cool out of the oven 20 minutes before slicing and serving.
  11. ENJOY IT (it’s so good)

NUTRITIONAL INFORMATION Per serving, serves 15. 304 calories, 21g fat, 8g carbs, 1g fiber, 18g protein

20161107_161321_resized

Kielbasa, Bacon & Cabbage soup

This. Is. Amazing. End of story.

INGREDIENTS:

  • 6 slices bacon, chopped
  • 16-24 oz of Kielbasa (I used 24oz b/c the Organic pork sausage I bought came in 12oz packages)
  • 1 small head of organic chopped cabbage (about 6 cups)
  • 1/4 cup onion
  • 1 tsp salt
  • 1/2 tsp pepper
  • minced garlic cloves (I used about 5)
  • 1 tsp dried thyme or 1 Tbl fresh thyme
  • 6 cups chicken broth (I had leftover turkey stock from last year so I used that!)
  • Freshly grated Parmesan for sprinkling (optional)

INSTRUCTIONS:

  1. In a stockpot over medium heat, cook bacon until crisp. Use a slotted spoon to remove the bacon onto a paper towel lined plate or, as we do in our house, a paper grocery bag!
    20161026_163515_resized
  2. Add sliced kielbasa and saute until nicely browned.
  3. Add onion and cabbage and cook, stirring often, until softened, about 5 minutes.
    20161026_163727_resized
  4. Add garlic, thyme, salt and pepper, cooking 1-2 minutes more.
  5. Add broth and bring to a simmer. Cook until cabbage is tender, about 10 minutes. Season to taste (I added another teaspoon of salt)
  6. Serve with a sprinkling of Parmesan (optional)

20161026_175456_resized

NOTE: The bacon I used created A LOT of grease. I poured about half out but don’t be surprised as you do want to keep about 1/4 a cup of bacon grease inย  your pan for the rest of the recipe. If your bacon creates more than that, you are not obligated to throw any out, just be aware it will make it more rich (not necessarily a bad thing!) ๐Ÿ™‚

NUTRITIONAL STATS for 6 servings, using 1lb sausage

321 cals, 21g fat, 8g carbs, 2.5g fiber, 17g protein

Sausage and Veggie Skillet

As I officially feel more transferred into Fall, I’m doing more meal planning and seem to be erring to the side of soups and comfort food. This one pan/skillet dish met all my needs. Hot, fresh, delicious.

INGREDIENTS:

  • 3/4 lb green beans, trimmed and cut in half
  • 1 large head of broccoli, cut into florets
  • 2 large bell peppers (I used one orange, one yellow), chopped into thick squares
  • 9 oz (usually 3 sausages) sausage of your choice, sliced. I used Aidells Chicken Basil Roasted Garlic but any sausage would be good in this!
  • 6 Tbl olive oil
  • 1/4 tsp red pepper flakes
  • 1 tsp paprika
  • 1 tsp garlic powder
  • 1 Tbl each dried oregano and dried parsley
  • seasoned to taste with salt and pepper (I started with 1 tsp each and finished with more salt after cooking)
  • Optional: Grated Parmesan cheese

INSTRUCTIONS

  1. Preheat oven to 400 degrees F. Line a large baking sheet with parchment paper (foil can work, too).
  2. Place all chopped veggies and sausage on your sheet pan. Drizzle the olive oil and spices on top. Toss to evenly coat all the veggies (you can do this ahead of time in a bowl, too, if that’s easier for you).

    20161025_181619_resized

  3. Bake 15 minutes, remove from oven and flip all veggies/meat around. Bake for another 10-15 minutes or until veggies are crisp tender and sausage is browned.
  4. OPTIONAL: Sprinkle with freshly grated Parmesan cheese. (you know I did!)

20161026_123144_resized

NUTRITIONAL INFORMATION:
Serves 6. 278 calories, 20g fat, 16g carbs, 5g fiber, 12g protein

Roasted Bacon Brussel Sprouts

There are a million and one great recipes for roasted bacon brussel sprouts and while I’m sure mine is not unique, it is still darn delicious.

INGREDIENTS

  • 1 lb brussel sprouts, washed, bottoms trimmed and outer leaves removed
  • 4-5 slices of bacon, chopped
  • salt, pepper, garlic powder, paprika

INSTRUCTIONS

  1. Preheat oven to 425 degrees Farenheit and line a large sheet pan with parchment paper.
  2. Spread sprouts and bacon on baking sheet and season generously with salt, pepper, garlic powder and paprika (plus anything else you may like on there!)
  3. Bake for 2530 minutes, stirring sprouts and bacon halfway through
  4. Sprouts are done when fork tender, but not OVER tender (you don’t want to overcook them). If you have smaller sprouts, you may want to cook closer to 20 minutes. Mine were medium so I cooked for 30 minutes and they were perfectly done. Larger ones may require more time.

Eat and enjoy!!

20161026_165924_resized

Roasted bacon sprouts ready for fridge storage!


The best anti-depressant

Let me start by saying a few things, since it’s been a hot minute since I checked in.

1. I haven’t been to the gym in about one month.

2. My eating plan has coincided with that lack of activity and I’ve not been giving it my all on making the best and healthiest choices for myself.

3. In the past week, I’ve had some stuff happen in my personal life that has me feeling simultaneously split wide open and closed up tight, like I’m deep inside a war tank.

So. With all that being said, I have not felt my best self. I was deeply moved and inspired by my time in Nashville at the WLSFA conference and even more so when I saw one of my best, dear friendsย  have an epically amazing recovery from some very intensive plastic surgery that will yield her the results she was looking for and lend her to feel more herself than ever. It reminded me of my end goal. And the things I need to do to get there. And then shit sort of hit the fan in my personal life and I’ve been gasping for air since.

What does that mean? It means I spent three days pretty much eating whatever I wanted and binge drinking. Think wine, donuts, macaroni and cheese, champagne and …more wine. And melted cheese tortillas. Lots of those.

So there you go… it’s all laid out for you…ย  I coped for three days in a way that left me bloated, numb, tired and four pounds heavier on the scale. But I had set my limit with it. I was going to give myself those three days and I needed that numbness for those days to just get through. It did it’s job, I suppose. It’s a short term solution and it did it’s job. But I’m not one to sit on the pity pot for too long because how annoying is that? I can’t really stand myself too long like that.

Today, I did what any self respecting, goal-oriented, self loving woman would do; I got my food more in line and I went to the gym. And I lifted. I went hard, I sweat hard, I pushed hard. And although I’m not numb… I am certainly feeling… I at least feel prepared to cope. And it’s amazing (side note) how a body can remember. I haven’t lifted in a month and yet my body was, albeit a little bit weaker, in great form. And ready for the burn. I’m proud I’m exercising my right to engage in my best and most favorite anti-depressant – endorphines. ACCOMPLISHMENT and fitness do so much for my self esteem and emotional well being.ย  If youย  haven’t tried it yet, I recommend you do. ๐Ÿ™‚

IMG_20160607_141104

DAY ONE back at it! Upper body lift

Until then, life goes on and I’m putting one foot in front of the other, I have the support of SO many amazing people who love me, and I’ll be back at the gym tomorrow to get another good sweat on before my trip to Boston tomorrow night.


Taco Salad

Since we already have some ingredients ready from making breakfast burritos, let’s put that to use for a lunch/dinner! I took those onions/peppers that we used for yesterday’s breakfast and made an amazing taco salad for dinner. This is what I used for ONE serving. Stats are below for this meal

INGREDIENTS:
3 oz browned turkey meat, cooked with 1 packet of taco meat (follow the instructions on the packet)
1/4 cup leftover onion/pepper mixture
1/4 cup leftover beans from breakfast burritos
7 blue corn organic tortilla chips
1/3 cup low fat cheddar cheese
1/2 tomato, chopped
2 Tbl avocado
1/2 – 1 cup shredded lettuce
2 Tbl low fat sour cream OR yogurt ranch dressing
chopped cilantro, add to taste

INSTRUCTIONS:

  1. Microwave your onions/peppers & bean mixture for 45 seconds or so
    20160503_171549_resized
  2. Add 3 oz of taco meat
    20160503_172915_resized
  3. Add cheese, tomato, avocado, tortilla chips, lettuce, cilantro & dressing.
    20160503_172905_resized
  4. Toss to mix and ENJOY!ย  Easy Peasy!

    20160503_173436_resized

    STATS for this meal using ranch yogurt dressing:
    450 calories, 27g carbs, 24g fat, 30g protein

Breakfast Burrito/ Scramble

My friend made some killer brekkie burritos at my book club weekend last weekend and I thought I’d make my own and see how it went. Yesterday I made it burrito style and today I made it scramble style. Stats included below!

Serves FOUR

INGREDIENTS:

1 can beans of your choice (I used kidney beans b/c I had them around but I’ll use black beans next time), drained & rinsed
1 lb bacon
4 eggs, beaten
1 avocado
1 medium onion, chopped
1 red pepper, chopped
4 tortillas (I used corn, but prefer flour)
1 & 1/3ย  cup low fat cheddar or Mexican blend cheese

INSTRUCTIONS:

  1. Cook the bacon on a skillet or in a cast iron skillet or in the oven… however you normally prefer to cook your bacon.

    20160503_114206

  2. Saute the onion and red pepper in just a drizzle of olive oil.

    20160503_114200

  3. Heat the beans (on stovetop or in microwave). Set aside.
  4. Scramble your egg(s) – (I was cooking just for one person, so I usedย  1 egg)
    20160503_115154
  5. Arrange 1 egg or 1/4 of scrambled egg and 1/4 cup onion mixture on a tortilla with 2 Tbl of avocado, 1/3 cup cheese, 2 slices bacon, 1/4 cup beans. Season and enjoy!!

20160503_115454

Stats for 1 breakfast burrito using 1 Mission super soft, large corn tortilla: 442 calories, 27g carbs, 16g fat, 23g protein

FOR SCRAMBLE:
Turns out, I really don’t prefer corn tortillas, but I don’t buy flour tortillas b/c I haven’t found a brand without hydrogenated oil in it which is a no no for how I prefer to structure my diet. SO… this morning I did a scramble instead.
Essentially I did all steps above EXCEPT… I used 1 egg and 3Tbl egg white and put my 2Tbl avocado on the side vs. cooking it all together

20160504_094440_resized

STATS for the scramble:
367 calories, 14g fat, 19g fat, 31g protein.

P.S. The scramble was SOOOO yummy!!

Stay tuned tomorrow for TACO SALAD… mmmmm good!!

DIY Paleo Mayonnaise

I get asked all the time for my Paleo mayonnaise recipe and I’ve made a video on it (which you can watch here) but it’s been a while. This is the key ingredient to why my chicken salad is so amazing and ALL my other salads (aka tuna salad, egg salad, etc. etc.) So here you go!

INGREDIENTS
2 eggs, room temperature (very important, I leave mine out overnight)
2 cups extra light tasting olive oil (also very important, regular olive oil will taste VERY olive-oily
2 Tbl Braggs Apple Cider Vinegar
1 tsp yellow mustard
2 pinches of: Salt, pepper, paprika
Generous sprinkle of garlic powder

TOOLS NEEDED:
A food processor *
spatula
glass jar(s) to store mayo in

20160503_113239
INSTRUCTIONS

  1. In a food processor, combine the 2 eggs, vinegar, mustard and seasonings.
  2. Run processor for about 20 seconds to combine ingredients
  3. Very very slowly (a drizzle the speed just past a drop at a time), add the olive oil to the mixture until it’s fully combined. This should take 10 minutes or so. IF you have a food processor that has an automatic drip cup, you don’t need to do this step, you can just fill the cup with the oil and it will moderate the speed for you. If you are not sure how slow is slow, watch my video to get an idea.

    20160503_114215

  4. When oil is fully incorporated, add product to glass jars and keep up to 1-2 weeks.

20160503_115217

* NOTE: If you do not have a food process, you can use a blender and add the oil in through the top. This will not work with a magic bullet.

A few other considerations. I have made this a kazillion times and it took me a few times to figure it out. If you go too fast, it won’t coagulate the way it should. If you go too slow and you have an older blender/processor, you run the risk of it overheating and ruining the whole batch. Just experiment to find that sweet spot OR buy the food processor I have and the darn stuff makes itself!

Bacon Tart

I saw the basics of this recipe in a video someone posted on the facebook but it was all in Danish or Swedish (aka, I could not understand the recipe!) so I improvised what I thought was what and IT.WAS.AMAZING!!! I made it for my Julia Robert’s movie night and while pizza may have been a more appropriate choice for watching Mystic Pizza, this was a huge crowd win!

INGREDIENTS:
2 lbs of bacon
8 new potatoes, boiled, but firm
8 oz cheddar cheese, grated (I used Beechers Flagship Cheddar)
fresh rosemary
Seasonings to taste (salt, garlic powder, paprika, pepper)
20160428_173452

INSTRUCTIONS:

1. Preheat oven to 350 degrees. In an oven-safe skillet, layer the bacon in a spiral so that alternating pieces are in the center (2 2 in the center, then offset a third piece about an inch back so it doesn’t get too thick in the center).

20160428_174422

2. Slice the boiled potatoes into 1/2 inch disks. Create a ring of potato slices around the outer edge, then fill in the center.

20160428_175103

3. Sprinkle with salt, pepper, rosemary and any other seasonings (be aware to not over salt as the bacon will be salty). Cover with cheese.

20160428_175135

4. Repeat steps 2 and 3 to create a second layer.

5. Fold the strips of bacon into the center, covering the tart.

20160428_175806

6. Back the tart for 20 minutes. Raise the temp to 400 degrees and bake for another 20 minutes until the bacon is crispy (I did it for 30 minutes + 7 minutes broil)

7. Drain the rendered fat from the pan.

8. Place a serving dish over the tart and using a towel or potholder to protect your hand, flip the tart over on the plate.

20160428_191113

9. Cut and serve!